You ask what is the Pinball effect? Just like a pinball that is bouncing all around from side to side - up and down- and tossed to and fro by levers thrown in it's way.
I have, in my excitment to get organized, been doing just that. I know what you are saying and you are right! (my husband loves it when I say that) I will just have to Organize my Organization.
When I went to take pictures of the areas I had messed up in the name of organization. I found there were only three areas.
A Hallway I had started to put things in so I could begin organizing my storage room and new playroom
A bathroom were I had emptied all the cupboards and drawers so I could de-clutter and re-organize. I started this room because I was cleaning it and I just had to dig in
And a basket I had been storing school supplies in. Definitely a future post. I started on this basket because it was 4:00 in the morning ( I do that sometimes) and I had to think of something quiet to do.
I also was in the middle of canning pears
You have to admit they look great! And they do taste delicious.
Well the effect of all these projects going on simultaneously was the pinball effect in my head. No lie. Just thinking about it makes my head start to hurt and my heart start to race and chaos is starting to take over. See it isn't just those three areas. I have a lot more areas in my head that I am excited about getting organized.
So I need to organize my organization.
I will start by making a list of all the projects I would like to do and putting the list in a place that I can add to it easily while I am cleaning the house or just daydreaming about how I want things to be etc. (My husband would also like to add to this list)
Next I will prioritize my projects according to greatest impact, ease, and financially do-ability (I do need to stay within my budget, right?)
I share this with you so you too will think of a good way to organize your organization and can avoid having the pinball effect take over you life.
PS. I would like to thank all of my supporters. My daughters: Sara for her excitement to get organized herself. Brittany for her encouraging words. Lindsay for keeping me on track. Bethany for staggering backwards. My sons Noah for giving up computer time, William for being in England. My son-in -laws: Robert Palmer for being my number one fan (Trust me he knows how to be a fan), Nate, Matt and Neil (Robert as well) for making my daughters happy and helping in the yard. And most of all David my dear husband for editing and encouraging. (I told you Robert that I would get your name in somehow)
Monday, September 9, 2013
Friday, September 6, 2013
Wrapping Paper
So this is the moment that you have been waiting for (OK, I have been waiting for). I have finished my first DIY project. My son now occupies the bedroom were my wrapping paper has been stored in two under-the-bed storage boxes. I really don't think he wants to store them for me. As I was looking at some of my favorite blogs, I saw on http://iheartorganizing.blogspot.com a great wrapping paper organization system. After reading the blog I went to the link on the website to "The Container Store" where they sell this great system. I loved it! But on sale the system was $75.00 Aah! If I have to spend that much for every project I do it will take me 20 years (I like to exaggerate) to get through my house. I needed to come up with a cheaper solution. Looking at more sites I saw several wrapping paper stations with tons of great ideas. Each station I saw had their own little twist that met each person's different needs. I now had enough ideas to come up with my own solution.
This is a picture of my wrapping paper, gift bags and ribbons. Looking at it you know what the first thing I need to do is. That's right. DE-CLUTTER.
I took this picture to show you my collection of recycled ribbon. It usually is arranged a little neater but I had already thrown it all away and had to dump it back into the box to show you how courageous I am being. De-cluttering takes a lot of courage for me.
While I was going through the ribbon and trying to decide whether to keep the ribbon or not I found one that was held together by an elastic in back making it a perfect head band for me. I enjoyed wearing it the rest of the day.
I knew I wanted to make my wrapping paper station hang on the back of a closet door so when I saw these over the door hooks in the clearance aisle at TJMaxx I grabbed it.
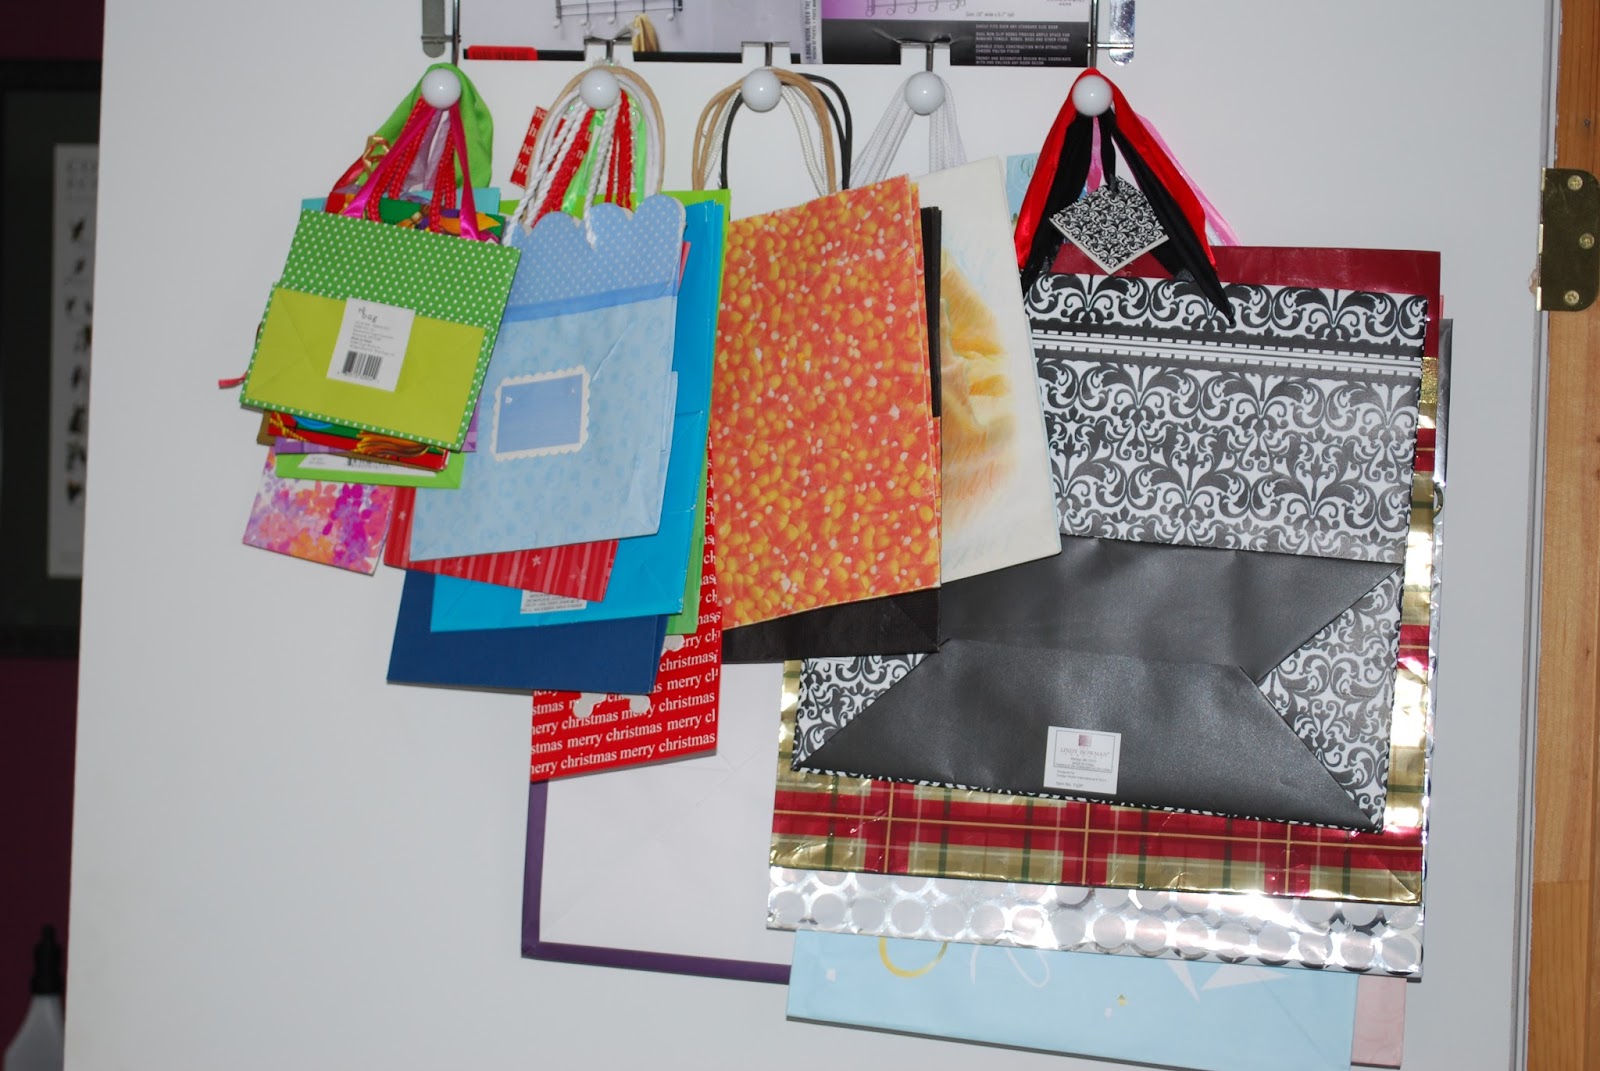
Trying to figure out how I was going to design my station I played around with my gift bags and hung them on the hooks by size (more or less).
So I think I have too many bags and may want to give some away.
Now that I could see what I had left I came up with a plan for my station. Since my goal was to spend as little as possible to make this work I went shopping around the house and yard. My husband had some wood slats that he had used last year to make tomato cages. These would work perfectly to make the shelves I wanted to put on the frame I made using a 1x2 piece of pine purchased from Home Depot.
I then measured and cut the slats for three shelves. One for wrapping paper rolls and two for ribbon and all the other accessories.

Organizing the bags according to similar colors made the bags look so much more organized than in the picture before
Putting the larger gift bags and gift boxes on the bottom shelf also make for a neater look.
As you can see I don't have too many rolls of wrapping paper but now that I have a place to put them where they won't get smushed (not really a word) and destroyed I am sure I will be acquiring some more.
With small cup holder hooks screwed into the front I was able to put a wooden dowel to hold tissue paper. Yes my tissue paper is mostly recycled tissue paper from gifts given to my family. I used to feel a little embarrassed about that but now I just say that I am going green.
Thanks for your patience waiting for this post. It would have taken even longer to finish but my husband said that "you just don't paint crates" (which is kind of the look that inspired this station). "It is best to go for the natural look". Since I was so excited to finish this project and show it to you I agreed.
I would love to hear any creative ideas you have for storing your wrapping paper.
This is a picture of my wrapping paper, gift bags and ribbons. Looking at it you know what the first thing I need to do is. That's right. DE-CLUTTER.
I took this picture to show you my collection of recycled ribbon. It usually is arranged a little neater but I had already thrown it all away and had to dump it back into the box to show you how courageous I am being. De-cluttering takes a lot of courage for me.
While I was going through the ribbon and trying to decide whether to keep the ribbon or not I found one that was held together by an elastic in back making it a perfect head band for me. I enjoyed wearing it the rest of the day.
I knew I wanted to make my wrapping paper station hang on the back of a closet door so when I saw these over the door hooks in the clearance aisle at TJMaxx I grabbed it.
Trying to figure out how I was going to design my station I played around with my gift bags and hung them on the hooks by size (more or less).
So I think I have too many bags and may want to give some away.
Now that I could see what I had left I came up with a plan for my station. Since my goal was to spend as little as possible to make this work I went shopping around the house and yard. My husband had some wood slats that he had used last year to make tomato cages. These would work perfectly to make the shelves I wanted to put on the frame I made using a 1x2 piece of pine purchased from Home Depot.
After hammering the slats into shelves and nailing the shelves to the frame I had all that I needed to organize.
Here is my finished project!
Much better than the two boxes under the bed!
The chain that I used to hang the frame to the hooks was an old chain left over from some hanging baskets we had used in the yard, making the final cost for me to make this wrapping paper station $7.50. The over the door hooks cost $5, the 1x2 pine board used for the frame cost $1.25 and a small dowel used to hold the tissue paper was another $1.25 Not too bad! OK I lie. I forgot the paint primer I used that cost $2.99 add a little for tax and the grand total is $11.
.
The Ribbon shelves have room to add more supplies such as tags and cards.
Organizing the bags according to similar colors made the bags look so much more organized than in the picture before
As you can see I don't have too many rolls of wrapping paper but now that I have a place to put them where they won't get smushed (not really a word) and destroyed I am sure I will be acquiring some more.
With small cup holder hooks screwed into the front I was able to put a wooden dowel to hold tissue paper. Yes my tissue paper is mostly recycled tissue paper from gifts given to my family. I used to feel a little embarrassed about that but now I just say that I am going green.
Thanks for your patience waiting for this post. It would have taken even longer to finish but my husband said that "you just don't paint crates" (which is kind of the look that inspired this station). "It is best to go for the natural look". Since I was so excited to finish this project and show it to you I agreed.
I would love to hear any creative ideas you have for storing your wrapping paper.
Wednesday, September 4, 2013
Organizing Rocks
Yes that is right! Rocks can and need be organized.
I have been working on a project to share with you but it is taking longer than expected so I thought I would buy a little more time by sharing my favorite project of the summer.
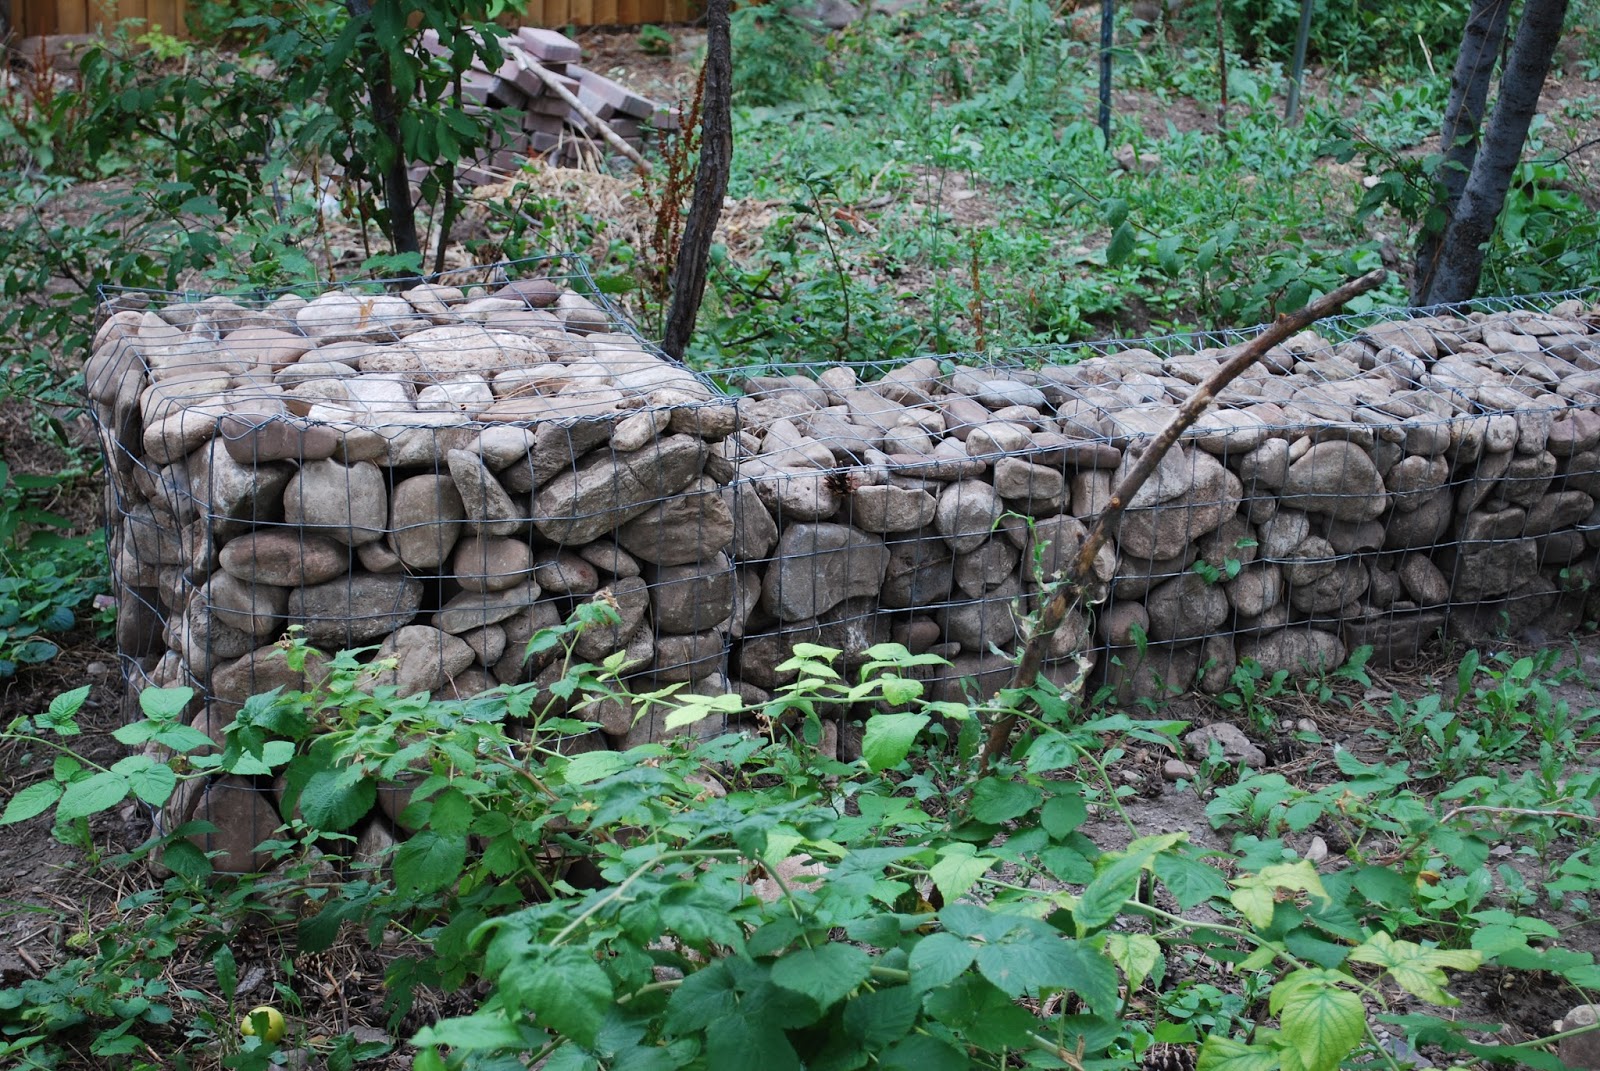
We live on an old creek bed so if we do any digging or planting we run in to rocks. Lots and lots of rocks. Well we wanted a trampoline that was in the ground. That meant lots of digging and lots of rocks. I wish I had a picture of the big pile of rocks that we had so you could see what I mean. Anyway to get to the point while we were watching HGTV they did a show with "Gabion Baskets". These are wire baskets that you can put all kinds of things in but mostly people use them to organize their rocks. They make tables, walls, benches, planter boxes and many other creative things. I loved them and knew the "Gabion Baskets" were going to be the answer to my rock problem.
You can order these baskets online but we made our own with wire we bought at Home Depot.
The baskets can be made any size you want.
We plan on topping the baskets with cedar planks to make benches and side tables.
I have been working on a project to share with you but it is taking longer than expected so I thought I would buy a little more time by sharing my favorite project of the summer.
We live on an old creek bed so if we do any digging or planting we run in to rocks. Lots and lots of rocks. Well we wanted a trampoline that was in the ground. That meant lots of digging and lots of rocks. I wish I had a picture of the big pile of rocks that we had so you could see what I mean. Anyway to get to the point while we were watching HGTV they did a show with "Gabion Baskets". These are wire baskets that you can put all kinds of things in but mostly people use them to organize their rocks. They make tables, walls, benches, planter boxes and many other creative things. I loved them and knew the "Gabion Baskets" were going to be the answer to my rock problem.
You can order these baskets online but we made our own with wire we bought at Home Depot.
We plan on topping the baskets with cedar planks to make benches and side tables.
Don't you just love them? Rocks no longer are the bain of my existence. When I am back by my rock walls I feel as though I am in the canyons and I love it. Who knew organizing rocks could be so rewarding and fun?
Monday, September 2, 2013
Sunday Dinner
Sunday dinner at our house usually means lots of food and lots of noise. But most of all it means lots of love. Sunday dinner can be a good place to get organized. A simple organizational tool can be implemented here to answer questions such as "What should I bring". The tool that I am going to show you is one that my own mother used successfully for many years while I was growing up.
You start by making two circles. One larger than the other. Card stock or poster board work great.
Next divide the circle by the number of people you want to participate in helping to make your Sunday meal.
Write their names on the smaller wheel and then on the larger wheel create the different components to your meal such as Salad, Vegetables etc. (So if you look at the wheel closely you will see that I spelled vegetables "vegitables". That is what you get when you write vegi's to many times and get up at 4:00 am to post this blog. I thought about fixing it and I will. I don't want anyone to learn how to spell incorrectly from me but I also don't want to have to retake the pictures.)
Next put the smaller circle or wheel on the larger one. Then you put a grommet in the middle of the two circles to hold it together and to allow the circles to turn separately.
Notice how Lindsay is in charge of Salad one week and then the next she is in charge of Vegetables.
You start by making two circles. One larger than the other. Card stock or poster board work great.
Write their names on the smaller wheel and then on the larger wheel create the different components to your meal such as Salad, Vegetables etc. (So if you look at the wheel closely you will see that I spelled vegetables "vegitables". That is what you get when you write vegi's to many times and get up at 4:00 am to post this blog. I thought about fixing it and I will. I don't want anyone to learn how to spell incorrectly from me but I also don't want to have to retake the pictures.)
This system is easy to make and to implement. For years I thought my mother wanted to teach us cooking skills by assigning us the different elements of the meal. Later she told us that she created the system to keep us busy so we wouldn't argue and spoil the atmosphere of the day. Organization can bring peace in many ways.
Thursday, August 29, 2013
Kitchen drawers
When your goal is to organize the whole house it can get a little overwhelming. I have decided to stay with drawers, cupboards and closets for awhile. It is easier for me to designate their assigned purpose. My kitchen has a lot of those so that is what I will focus on for the next few blogs.
I have four drawers to hold my different cooking /baking tools.
My usual first step is to empty the drawers and then evaluate what I have and what I really need. With the encouragement from the comment by BeDesigned on the Jewelry Draw post I knew I could do this. I can get rid of the things I don't really need.
Whisks: I just purchased the two black ones to use with my non-stick pans so they stay. The Blue one is broken (that is why I bought the black ones) so it goes. the silver ones I will keep the three heavy duty ones so two more are gone. Ok here is the hard one. The gravy mixer. My grandmother gave it to me when she was cleaning out her drawer. (she passed away 22 years ago so that gives you some idea at how old it is) The metal in the middle is rusty and I don't want to use it in food for that reason. You ask what I would say to someone with a similar emotional hang up. I would say "take a picture of it and write about it in your journal to see and share and then move on. So that is what I will do.
Knifes: get rid of them all. I have a great knife set in a block on my counter so why keep these knives that I never use? I think I am making excellent progress here.
Graters: Keep all
Rubber Spatulas: One of each size. I think the orange, green and dark orange one
Ok, progress may have been slowing down a bit.
Spatulas: Love them all! a must keep
Wooden Spoons: Keep two. I really am only keeping them for my daughter Lindsay to use when she makes soup at my house which is fairly often. (Hey, If someone wants to cook for me, who am I to complain)
Baby spoons: Need them all for when the little ones come over. No I don't have that many grandchildren but they have to hold one while someone holds one to feed them and then you always need another one when one gets thrown on the floor. (that is a lot of ones)
Now this is getting boring so I will just show you what else was in the drawer without the blow by blow decisions that I made.
The time has come to put it all back.
No wait! Distraction time.
My husband called and said he had found the dog they have been looking for. Other people wanted him too so I needed to hurry and make sure I got there first to claim this amazing animal so our poor little fifteen year old boy could have the companion of his dreams.
I have four drawers to hold my different cooking /baking tools.
My usual first step is to empty the drawers and then evaluate what I have and what I really need. With the encouragement from the comment by BeDesigned on the Jewelry Draw post I knew I could do this. I can get rid of the things I don't really need.
Whisks: I just purchased the two black ones to use with my non-stick pans so they stay. The Blue one is broken (that is why I bought the black ones) so it goes. the silver ones I will keep the three heavy duty ones so two more are gone. Ok here is the hard one. The gravy mixer. My grandmother gave it to me when she was cleaning out her drawer. (she passed away 22 years ago so that gives you some idea at how old it is) The metal in the middle is rusty and I don't want to use it in food for that reason. You ask what I would say to someone with a similar emotional hang up. I would say "take a picture of it and write about it in your journal to see and share and then move on. So that is what I will do.
Knifes: get rid of them all. I have a great knife set in a block on my counter so why keep these knives that I never use? I think I am making excellent progress here.
Graters: Keep all
Rubber Spatulas: One of each size. I think the orange, green and dark orange one
Ok, progress may have been slowing down a bit.
Spatulas: Love them all! a must keep
Wooden Spoons: Keep two. I really am only keeping them for my daughter Lindsay to use when she makes soup at my house which is fairly often. (Hey, If someone wants to cook for me, who am I to complain)
Baby spoons: Need them all for when the little ones come over. No I don't have that many grandchildren but they have to hold one while someone holds one to feed them and then you always need another one when one gets thrown on the floor. (that is a lot of ones)
Now this is getting boring so I will just show you what else was in the drawer without the blow by blow decisions that I made.
The time has come to put it all back.
No wait! Distraction time.
My husband called and said he had found the dog they have been looking for. Other people wanted him too so I needed to hurry and make sure I got there first to claim this amazing animal so our poor little fifteen year old boy could have the companion of his dreams.
You have to admit he is cute.
The drawers will have to wait to be completed. Life does get in the way sometimes. Even for organized people. At least I think so. How about you?
Subscribe to:
Posts (Atom)